Adding a wood-burning stove to your living room can significantly enhance the overall ambiance and functionality of your space. Known for their rustic charm and efficient heating capabilities, wood-burning stoves have become increasingly popular as a focal point in contemporary homes. The below guide will walk you through the benefits, what to consider, and the steps involved in installing a wood-burning stove in your living room.
Contents
Benefits of a Wood-Burning Stove
- Efficient Heating: Unlike traditional fireplaces, wood-burning stoves are designed to maximize heat output and efficiency. They burn wood more completely and produce more heat per log, which can reduce your reliance on central heating and lower energy bills.
- Eco-Friendly: Wood is a renewable resource. What’s more, burning wood releases only as much carbon dioxide as the tree the wood is taken from absorbed during its lifetime. Modern wood stoves are expertly designed to burn wood cleanly and efficiently, minimizing emissions.
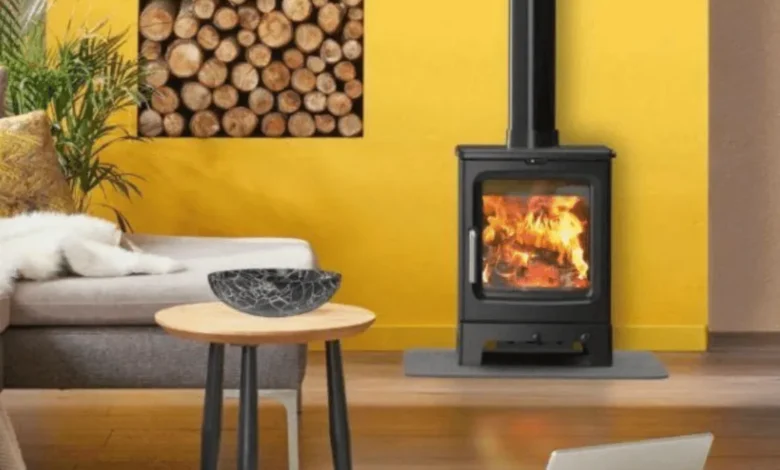
- Aesthetic Appeal: Wood-burning stoves add a rustic, cozy charm to any living room. The sight and sound of a crackling fire create an incredibly warm and cozy atmosphere, perfect for family gatherings and quiet evenings.
- Energy Independence: Using a wood-burning stove can provide an alternative heating source during power outages, ensuring that your home is warm and comfortable even when the electricity is out.
Considerations Before Installation
- Regulations and Permits: Before installing a wood-burning stove, check local building codes and regulations. You may need a permit, and the installation must comply with safety standards regarding clearances, venting, and hearth requirements.
- Location: Choose a location that maximizes heat distribution throughout the living room. Consider the proximity to existing chimney structures or the feasibility of installing a new flue.
- Size and Output: Select a stove that is appropriately sized for your living room. A stove that is too large can overheat the room, while one that is too small may not provide adequate warmth. Stove output is measured in BTUs (British Thermal Units), and your choice should be based on the room size and insulation quality. Look at retailers like stonewoods.co.uk to find your ideal size and output.
- Ventilation: You must have proper ventilation for safe operation. A chimney or flue system is necessary to vent smoke and gases outside. If your home lacks an existing chimney, you’ll need to install a stovepipe or chimney liner.
- Hearth and Clearances: A non-combustible hearth is required to protect your floor from heat and stray embers. Ensure adequate clearances from walls, furniture, and other combustible materials as specified by the stove manufacturer and local regulations.
Installation Steps
- Site Preparation: Prepare the site by ensuring the floor is level and can support the weight of the stove. Install a non-combustible hearth pad if one is not already in place.
- Assembling the Stove: Follow the manufacturer’s instructions to assemble the stove. This may involve attaching legs, doors, and other components.
- Chimney and Flue Installation: Install the chimney or flue system according to the manufacturer’s specifications and local building codes. This step is critical for ensuring proper draft and safe operation. If you are not experienced with this type of installation, it’s advisable to hire a professional.
- Positioning the Stove: Place the stove on the hearth, ensuring it is level and properly aligned with the chimney or flue. Secure the stove as required by the manufacturer.
- Connecting the Flue: Connect the stove to the chimney or flue using stovepipe sections. Make sure all connections are tight and sealed to prevent leaks.
- Inspection and Approval: Have the installation inspected by a certified professional or local authority to ensure it complies with safety standards and regulations. This step is essential for your safety and may be required for insurance purposes.
Maintenance and Safety Tips
- Regular Cleaning: Clean the stove and chimney regularly to prevent the buildup of creosote, which is a highly flammable byproduct of wood burning.
- Use Dry, Seasoned Wood: Burn only dry, seasoned hardwoods to maximize efficiency and minimize smoke and creosote buildup. Avoid burning green wood, treated wood, or other non-wood materials.
- Install Carbon Monoxide Detectors: Place carbon monoxide detectors near the stove and in other key areas of your home to alert you to any potential buildup of this dangerous gas.
- Monitor Air Quality: Ensure adequate ventilation in the living room to maintain good air quality. Periodically check for drafts or leaks around the stove and chimney.
- Fire Safety: Keep a fire extinguisher nearby and educate all household members on proper fire safety practices. Never leave a burning stove unattended, especially when you go to sleep or leave the house.
Conclusion
Adding a wood-burning stove to your living room can quickly transform the space into a warm, inviting haven while providing an efficient and eco-friendly heating solution. If you follow the steps above, you will enjoy the benefits of a wood-burning stove for years to come. Whether you’re drawn to the cozy ambiance or the practical heating capabilities, a wood-burning stove is a valuable addition that enhances both the functionality and aesthetics of your home.